
Over the last few weeks, I have been reading up a lot on LLM stack. Tools such as LangChain, Aviary, Hugging Face. Over the weekend, I thought I’d explore creating a chatbot using Hugging Face and Gradio, two cutting-edge frameworks that simplify the development and deployment of conversational AI models.
I started out with building a simple chatbot using the Microsoft DialoGPT model, Hugging Face Space, and Gradio interference. I am sure you will be able to develop and customize your own one using a similar technique. So let’s get started!
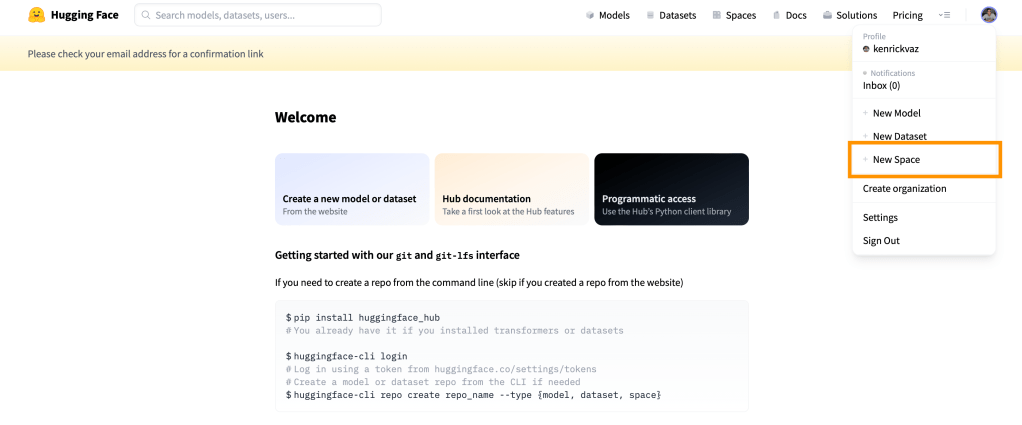
First head over to https://huggingface.co/ and create a free account. After that, click on your display image on top right and select “New Space” option.
Fill out the form with App name, Licence, Space hardware, and visibility.
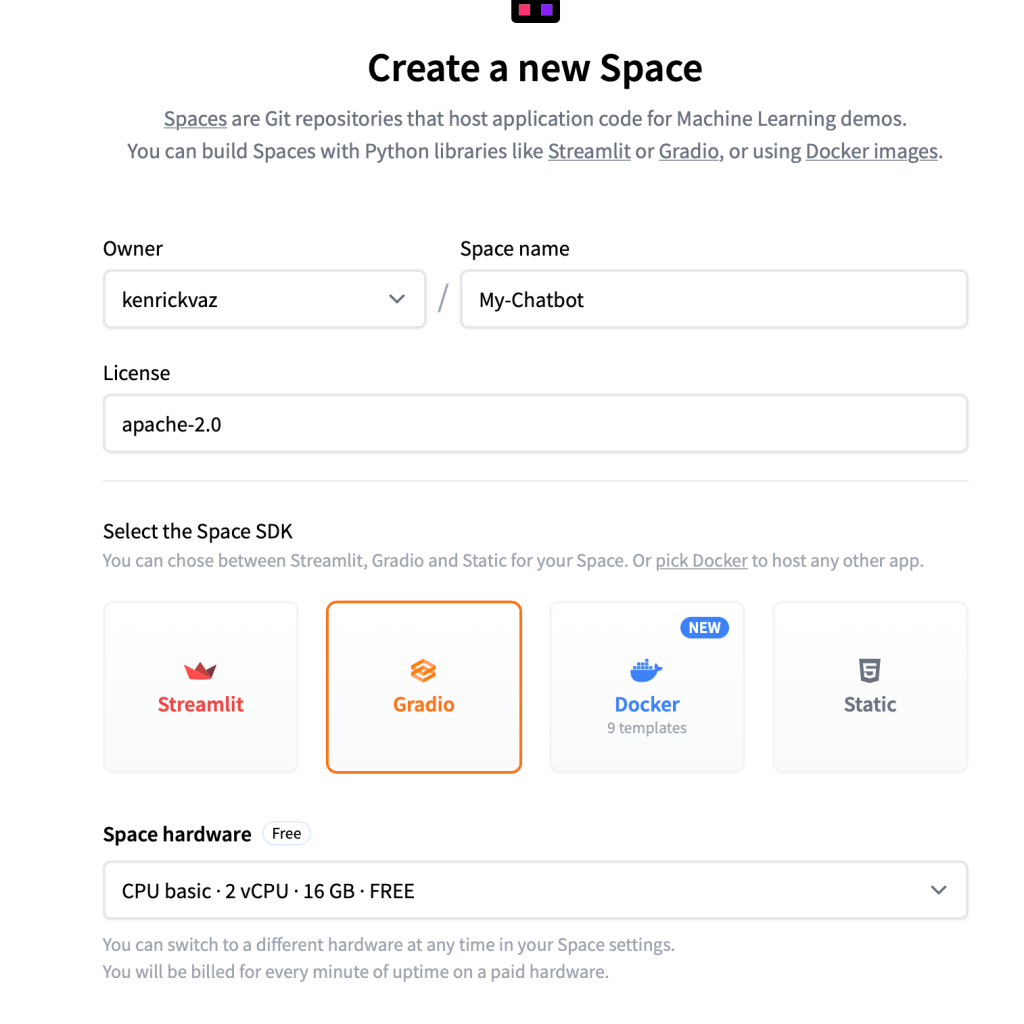
Press “Create Space” to initialize the application.
Next, on the space you just created, click on the “Files” tab > + Add file > Create a new file.
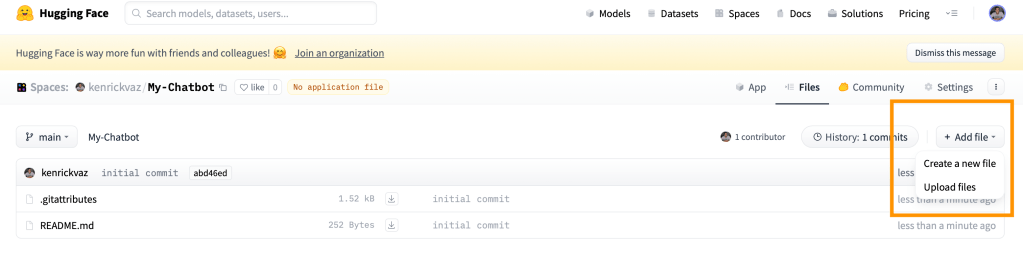
First let’s create the requirements.txt file to add the required Python packages. You can add the following
transformers
torch
We will next create app.py which basically has the Gradio interface.
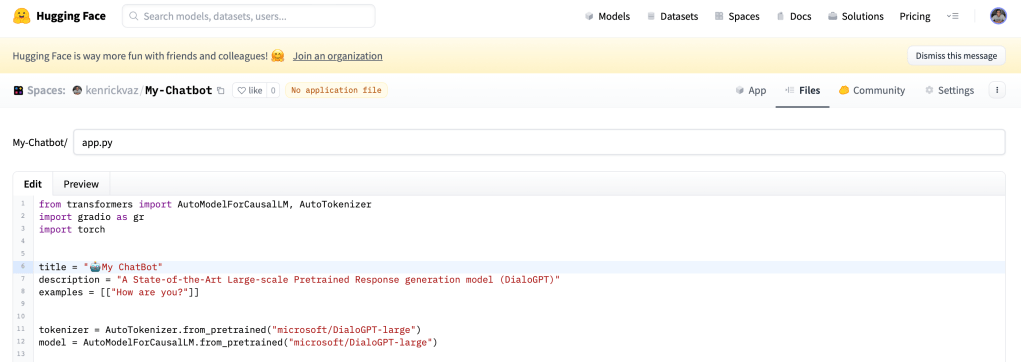
I have loaded the “microsoft/DialoGPT-large” tokenizer and model and created a `predict` function for getting the response and creating the history. You can take the full code for app.py below
from transformers import AutoModelForCausalLM, AutoTokenizer
import gradio as gr
import torch
title = "🤖AI ChatBot"
description = "A State-of-the-Art Large-scale Pretrained Response generation model (DialoGPT)"
examples = [["How are you?"]]
tokenizer = AutoTokenizer.from_pretrained("microsoft/DialoGPT-large")
model = AutoModelForCausalLM.from_pretrained("microsoft/DialoGPT-large")
def predict(input, history=[]):
# tokenize the new input sentence
new_user_input_ids = tokenizer.encode(
input + tokenizer.eos_token, return_tensors="pt"
)
# append the new user input tokens to the chat history
bot_input_ids = torch.cat([torch.LongTensor(history), new_user_input_ids], dim=-1)
# generate a response
history = model.generate(
bot_input_ids, max_length=4000, pad_token_id=tokenizer.eos_token_id
).tolist()
# convert the tokens to text, and then split the responses into lines
response = tokenizer.decode(history[0]).split("<|endoftext|>")
# print('decoded_response-->>'+str(response))
response = [
(response[i], response[i + 1]) for i in range(0, len(response) - 1, 2)
] # convert to tuples of list
# print('response-->>'+str(response))
return response, history
gr.Interface(
fn=predict,
title=title,
description=description,
examples=examples,
inputs=["text", "state"],
outputs=["chatbot", "state"],
theme="finlaymacklon/boxy_violet",
).launch()I have provided my app with a customized theme: boxy violet. You can browse Gradio Theme Gallery to select the theme according to your taste.
After this, your app will start building, and within a few minutes, it will download the model and load the model inference.
The Gradio App looks awesome. We just have to create a `predict` function for every different model architect to get responses and maintain history.
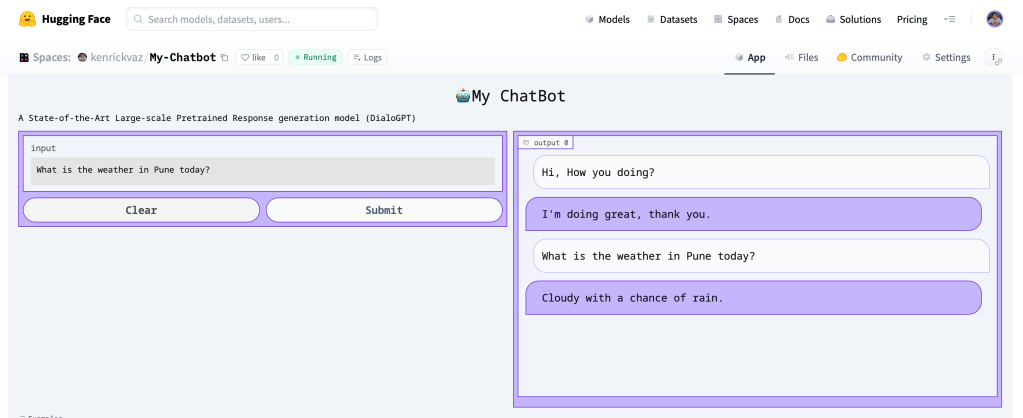
You can now chat and interact with the app on https://kenrickvaz-my-chatbot.hf.space
Hope you enjoyed building this simple chatbot along with me. You can check out hundreds of chatbots on Spaces for inspiration. And of course, please share your Gradio demo in the comment section!
